07.19.11 - Adding Logos
I had a request recently for some help adding a logo to a photo. With Photoshop, like any program, there are more than one way to skin the cat. Here is one of the methods.
1. Open the logo you are wanting to add. This is a jpeg. If you save the logo on a transparent background (the checkerboard background) and save it as a .png or .psd you can just jump to the dragging to the photo.
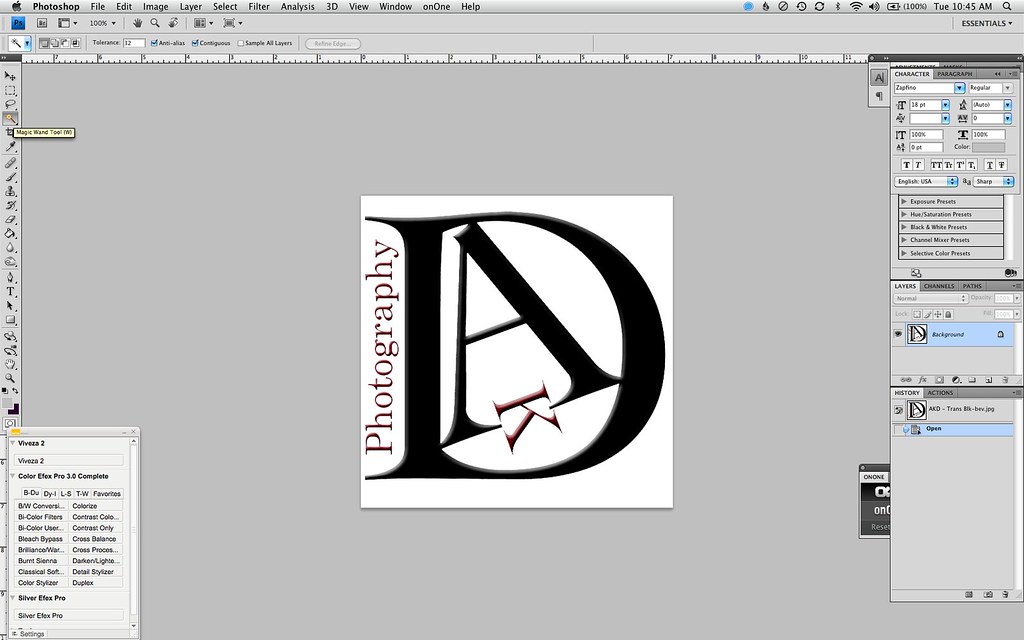
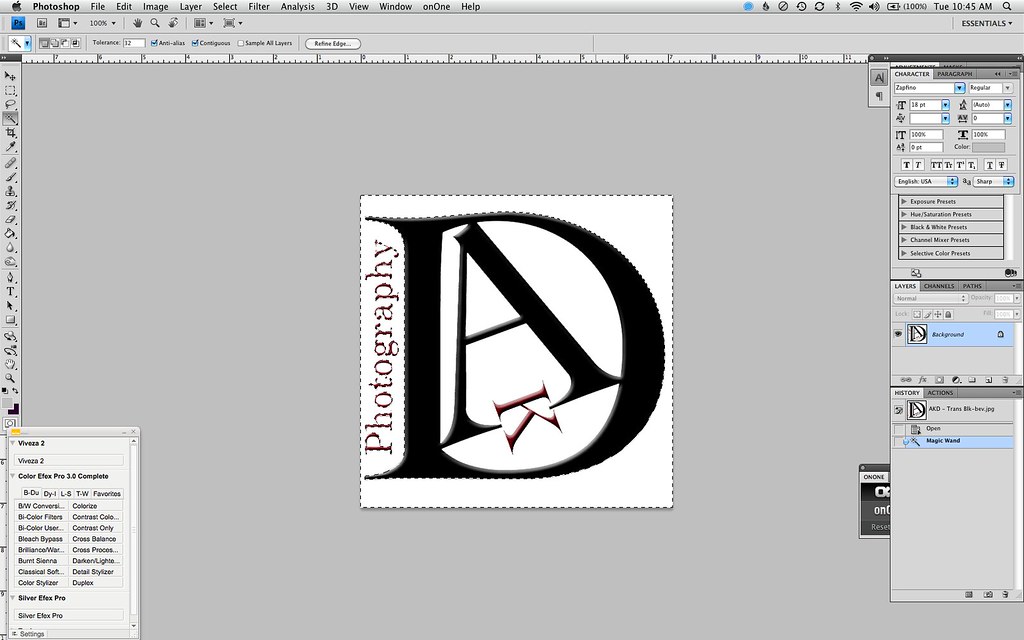
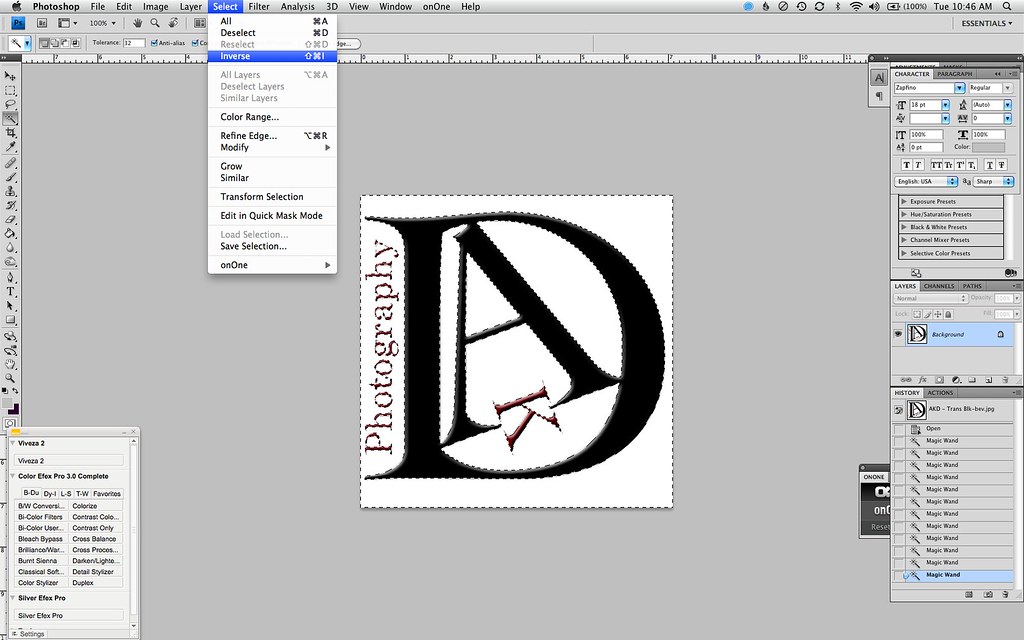
2. Select the MAGIC WAND from the tools and click on the solid background.
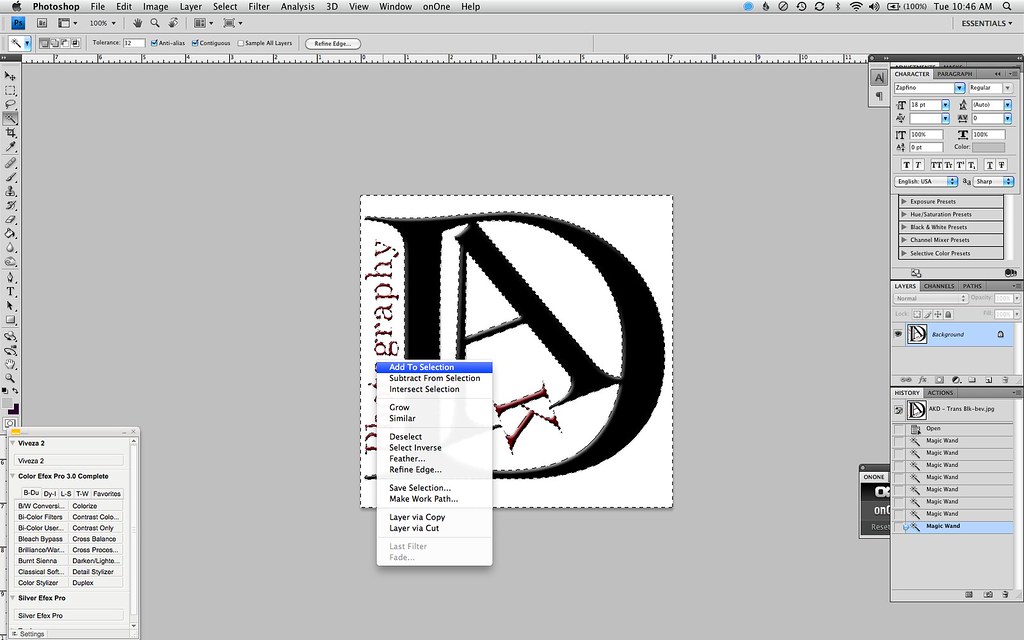
3. Control click to add to your selection. Use this for the centers of round letters or other fully enclosed spaces of background.
4. Select the inverse. This means instead of the background you are now selecting everything solid which you haven't selected prior.
5. With the photo open you want to add the logo to, select the MOVE tool.
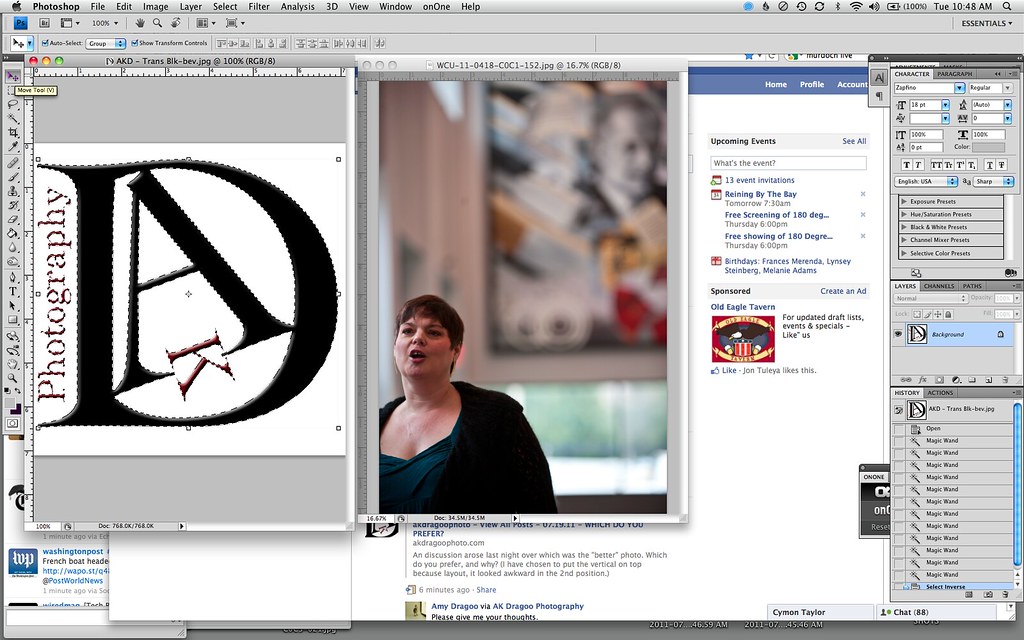
6. Click and hold on the logo, and drag it onto the photo.
7. Make sure the little box "Show Transform Controls" is checked. This will give you the white boxes which allow you to adjust the size of the logo. Make sure to hold the Apple key to keep the perspective the same as you play with the size.

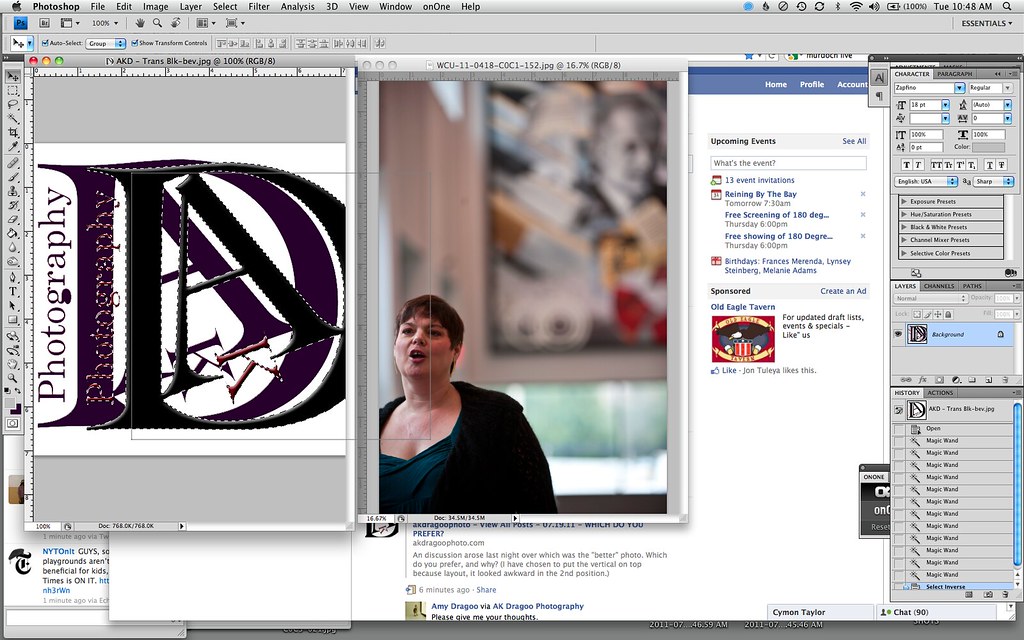
8. You can also move the logo around on the image for a placement you like. Once you start adjusting the size of the logo notice the bar where the Transform Control box has changed.

9. Select the MOVE tool again.

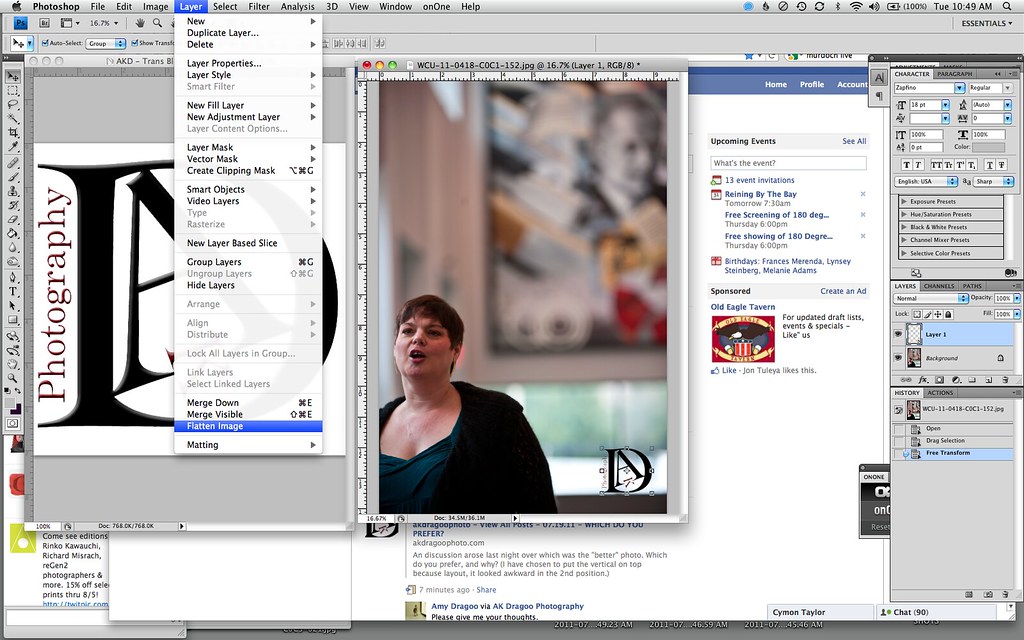
10. Once you have the logo the size and location you want it click APPLY. If you dont the logo will go back to the size and location you first dragged over.

11. In LAYERS flatten the image and logo. This makes them one image. You can save them without flattening them, but the file types are limited.